

Are you the author? Sign in to claim
Yutori MCP
MCP tools and skills for web monitoring, deep research, and browser automation — powered by Yutori's web agentic tech.
You can use it with Claude Code, Codex, Cursor, VS Code, ChatGPT, OpenClaw, and other MCP hosts.
Capabilities:
Workflow skills (for clients that support slash commands):
/yutori-scout — Set up continuous web monitoring/yutori-research — Deep web research (async, 5–10 min)/yutori-browse — Browser automation/yutori-competitor-watch — Competitor monitoring template/yutori-api-monitor — API/changelog monitoring templateIf you don't already have uv installed, install it (it includes uvx):
curl -LsSf https://astral.sh/uv/install.sh | sh
Or with Homebrew:
brew install uv
Python 3.10 or higher is required (uv manages this automatically for most installs).
For the quickstart below, Node.js is also required (for npx).
Paste this into Claude Code, Codex, Cursor, Windsurf, or another coding agent:
Use https://yutori.com/api/llms.txt and set up Yutori for me.
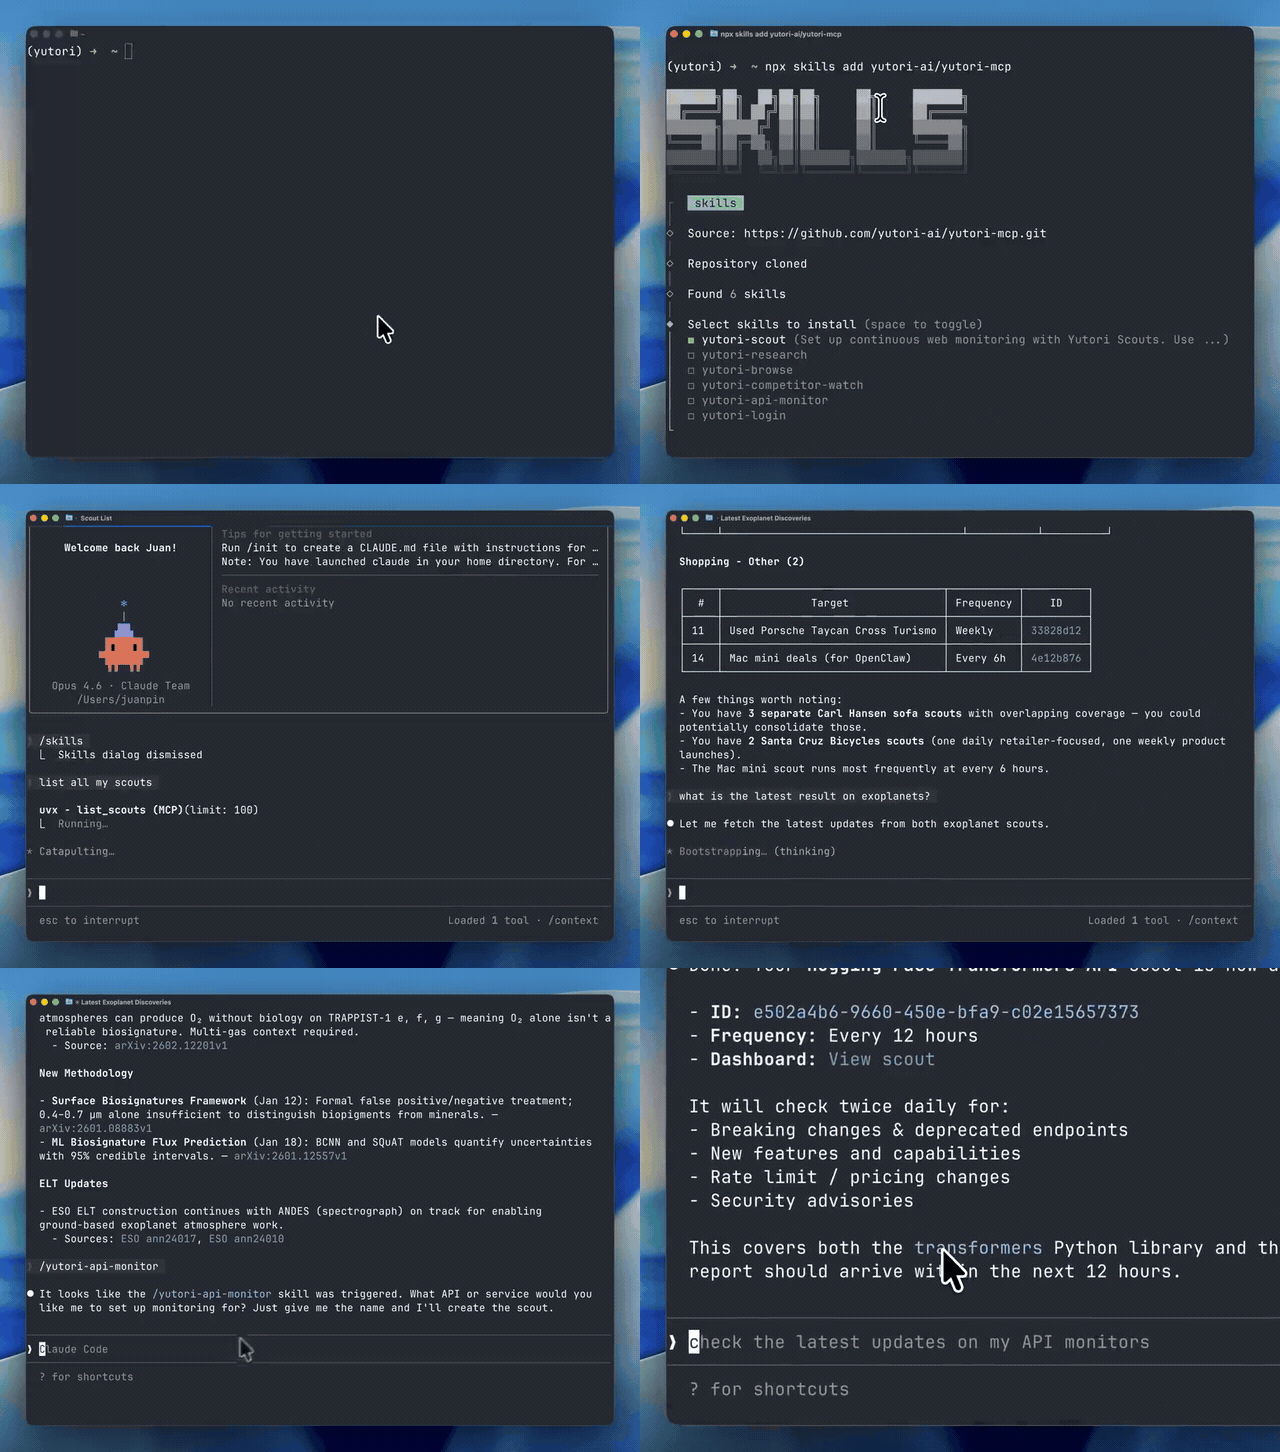
Run in terminal:
uvx yutori-mcp login
This will open Yutori Platform in your browser and save your API key locally.
Go to (https://platform.yutori.com) and add your key to the config file:
mkdir -p ~/.yutori
cat > ~/.yutori/config.json << 'EOF'
{"api_key": "yt-your-api-key"}
EOF
Install MCP using add-mcp (requires Node.js):
npx add-mcp "uvx yutori-mcp"
Pick the clients you want to configure.
Install workflow skills using skills.sh (requires Node.js):
npx skills add yutori-ai/yutori-mcp -g
Adds slash-command shortcuts like /yutori-scout, /yutori-research, and more.
-g installs them at user scope. Omit -g if you want a project-local install instead.
npx skills ls -g
npx skills remove -g yutori-login
Restart the tool you are using.
Plugin (Recommended) - Includes MCP tools + workflow skills
Type these commands in Claude Code's input (not in a terminal):
/plugin marketplace add yutori-ai/yutori-mcp
/plugin install yutori@yutori-plugins
This installs both the MCP tools and workflow skills:
| Skill | Description |
|---|---|
/yutori-scout | Set up continuous web monitoring with comprehensive queries |
/yutori-research | Deep web research workflow (async, 5-10 min) |
/yutori-browse | Browser automation tasks |
/yutori-competitor-watch | Quick competitor monitoring template |
/yutori-api-monitor | API/changelog monitoring template |
Already have the MCP server installed? Remove it first to avoid duplicate configurations:
hljs language-bashclaude mcp remove yutori -s user # if installed at user scope claude mcp remove yutori -s local # if installed at local/project scope
To uninstall the plugin later:
/plugin uninstall yutori@yutori-plugins -s user
MCP Only (if you prefer not to use the plugin)
claude mcp add --scope user yutori -- uvx yutori-mcp
The server reads your API key from ~/.yutori/config.json (set up via uvx yutori-mcp login).
Add to your claude_desktop_config.json:
{
  "mcpServers": {
    "yutori": {
      "command": "uvx",
      "args": ["yutori-mcp"]
    }
  }
}
The server reads your API key from ~/.yutori/config.json.
For setup details, see the Claude Desktop MCP install guide.
Click the button to install:

Or install manually:
Go to Cursor Settings → MCP → Add new MCP Server, then add:
{
  "mcpServers": {
    "yutori": {
      "command": "uvx",
      "args": ["yutori-mcp"]
    }
  }
}
The server reads your API key from ~/.yutori/config.json.
See the Cursor MCP guide for setup details.
Click the button to install:

Or install manually:
code --add-mcp '{"name":"yutori","command":"uvx","args":["yutori-mcp"]}'
The server reads your API key from ~/.yutori/config.json.
Open ChatGPT Desktop and go to Settings -> Connectors -> MCP Servers -> Add server.
{
  "mcpServers": {
    "yutori": {
      "command": "uvx",
      "args": ["yutori-mcp"]
    }
  }
}
The server reads your API key from ~/.yutori/config.json.
For setup details, see the OpenAI MCP guide.
MCP Server:
codex mcp add yutori -- uvx yutori-mcp
Or add to ~/.codex/config.toml:
[mcp_servers.yutori]
command = "uvx"
args = ["yutori-mcp"]
The server reads your API key from ~/.yutori/config.json.
Skills (optional, for workflow guidance):
Install skills using $skill-installer inside Codex:
$skill-installer install https://github.com/yutori-ai/yutori-mcp/tree/main/.agents/skills/yutori-scout
$skill-installer install https://github.com/yutori-ai/yutori-mcp/tree/main/.agents/skills/yutori-research
$skill-installer install https://github.com/yutori-ai/yutori-mcp/tree/main/.agents/skills/yutori-browse
$skill-installer install https://github.com/yutori-ai/yutori-mcp/tree/main/.agents/skills/yutori-competitor-watch
$skill-installer install https://github.com/yutori-ai/yutori-mcp/tree/main/.agents/skills/yutori-api-monitor
Or manually copy skills to your user directory (use -L so symlinks are dereferenced and real files are copied):
git clone https://github.com/yutori-ai/yutori-mcp /tmp/yutori-mcp
cp -rL /tmp/yutori-mcp/.agents/skills/* ~/.agents/skills/
To uninstall manually copied skills, delete the matching directories from ~/.agents/skills/. When updating this way, remove old Yutori skill directories first, since cp -rL will not delete renamed or removed skills.
Restart Codex after installing skills.
| Skill | Command | Description |
|---|---|---|
| Scout | $yutori-scout | Set up continuous web monitoring |
| Research | $yutori-research | Deep web research (async, 5-10 min) |
| Browse | $yutori-browse | Browser automation with AI navigator |
| Competitor Watch | $yutori-competitor-watch | Quick competitor monitoring template |
| API Monitor | $yutori-api-monitor | API/changelog monitoring template |
See the Codex Skills docs for more on skills.
Follow the Quickstart above:
npx skills add yutori-ai/yutori-mcp
Add to ~/.gemini/settings.json. If you already have mcp or mcpServers, merge these keys into your existing config:
{
  "mcp": {
    "allowed": ["yutori"]
  },
  "mcpServers": {
    "yutori": {
      "command": "uvx",
      "args": ["yutori-mcp"]
    }
  }
}
The server reads your API key from ~/.yutori/config.json.
Add "yutori" to mcp.allowed if you already list other MCPs there. For more details, see the Gemini CLI MCP settings guide.
Install the package to run the MCP server (e.g. for custom or self-hosted setups):
pip install yutori-mcp
See TOOLS.md for the full tool reference — Scout, Research, and Browsing tools with parameters, examples, and response formats.
git clone https://github.com/yutori-ai/yutori-mcp
cd yutori-mcp
pip install -e ".[dev]"
pytest
yutori-mcp login    # authenticate (one-time)
yutori-mcp          # run the server (or: python -m yutori_mcp.server)
The server hits the production API (https://api.yutori.com/v1) by default.
For testing, point it at the dev stack (https://api.dev.yutori.com/v1) with
the --env flag or the YUTORI_ENV environment variable (the flag wins if
both are set):
yutori-mcp --env dev
Or in an MCP client config:
{
  "mcpServers": {
    "yutori-dev": {
      "command": "uvx",
      "args": ["yutori-mcp", "--env", "dev"]
    }
  }
}
Setting "env": {"YUTORI_ENV": "dev"} in the server config works too. An
unknown environment name fails at startup rather than silently falling back
to production. Note that the login/logout/status auth subcommands
always talk to production; use a YUTORI_API_KEY valid for dev when
targeting it.
npx @modelcontextprotocol/inspector yutori-mcp
For full API documentation, visit docs.yutori.com.
Apache 2.0
Run Claude Code as an MCP server so any agent can delegate coding tasks to it
 @microsoft✓ Official
Browser automation using accessibility snapshots instead of screenshots
 @googleapis✓ Official
Google's universal MCP server supporting PostgreSQL, MySQL, MongoDB, Redis, and 10+ databases
 @github✓ Official
Official GitHub integration for repos, issues, PRs, and CI/CD workflows
